Showing posts with label Versatile food. Show all posts
Showing posts with label Versatile food. Show all posts
Wednesday, 17 September 2014
Homemade Curd / Homemade plain yogurt / How to make Curd / Yogurt / Dahi at home .... Kitchen Basics
Yogurt / Curd is one of the mandatory item is lunch menu of Indians and its almost made in every house here. Making this is such an easy one and healthy too with no preservatives.


Milk-1/2 litre
Starter / Curd / Plain yogurt - 2 tbsp
Setting time required : 6 hours or more depending on the weather.
To prepare Homemade Curd / Homemade Yogurt :
1. Boil the milk well and Cool till it is only slightly warm ( you must be able to comfortably insert your finger in it and stay like that for 15 seconds ). DO NOT USE HOT MILK.
2. Transfer the Curd / Plain Yogurt into the bowl in which you want to set the Curd / Yogurt and pour the warm milk over and mix well. Close the lid tightly and keep to set in a warm place for about 6-8 hrs or overnight.
3. If the Curd / Yogurt is still stringy or runny, keep for some more time until it is perfectly set . That's it your curd is set. Use this as the starter Yogurt for the next batch.
4. U can use this Curd / Yogurt to make varieties of Raitas, Curd rice / Daddojanam, Masala Lassis, Sweet lassis, for curries preparation to give mild taste, for Biryanis and Bath preparations and even u can just mix Curd / Yogurt with plain rice and have it with favorite Pickles and so on....as per ur wish and place refrigerate the remaining. In summer the curd set faster and in winter it may take long time.
Tips / Notes :
- Take care not to move / disturb the bowl of curd at the setting period.
- The curd taste and quality depends on milk and Starter / Curd / Plain yogurt brand and type, temperature of the room and the milk, the amount of starter curd and setting time affect the process of curd making.
- So, when you fail to get that perfect bowl of curd, don't let that discourage you. Change in any one or more of the above factors might do the trick and you will be rewarded.
- The best option to set the yogurt in cold country is to leave the bowl of curd covered with a plate in the oven with the light turned on. Do not turn on the oven itself. The heat from the light is enough to give it that extra push.
FAQ’s about Yogurt / Curd :
1. Why did my curd not set properly?
Your milk might have been too hot or cold at the time of adding curd/culture.
Your quantity of curd/culture was not enough.
2. Why is my curd half-set (half of it is curd and the other half is milk)?
Once you add the curd, you should stir well such that curd and milk are blended well. Curd should mix with the milk uniformly.
3. Can I use sour curd as a culture instead of fresh one?
Always use fresh curd. Whenever you make a batch of curd, reserve a teaspoon of curd for the next batch. You can either freeze or refrigerate the culture. Before going to India myself put a cup of curd in the freezer. Once come back, i will make a new batch of curd with the frozen culture. If you are using the frozen culture, let it come to the room temperature, and then add it to the lukewarm milk. If you use sour curd, your new batch of curd will turn sour quickly.
4. Even after 5 to 6 hours, my curd has not yet set, what should I do?
Place the curd in a vessel of hot water and leave it aside for another 1.5 to 2 hours. If the curd does not set, then somewhere something has gone wrong. Do not worry. You will get it by practice and experience.
5. My curd is little watery. What should I do?
Try refrigerating it for 2-3 hours.
6. I live in a cold place. I see my curd is taking a long time to set up.
For a cup of milk, instead of adding 2 teaspoons of curd, add 3.5 teaspoons of curd. Also place the curd in a vessel of hot water and leave it aside for it to set. You can also preheat the oven for just 2 minutes at 180C. Switch off the oven. Keep the oven lights on and place the curd container inside the oven for 7 hours or let it stay overnight.
7. By mistake, I allowed the milk to cool down completely. What should I do now?
Its okay. Just heat the milk up and when it is lukewarm, add the curd culture.
8. When I boil milk, the bottom of my pan gets burnt and the milk has burnt flavor?
Keep stirring the milk on and off. or else use a non-stick pan.
9. Can I use the same container that I boiled milk to set up curd?
Do not make curd in the same container that you boiled milk. Set the curd in a different container.
10. Can I remove the cream that is formed on the milk?
It is your choice. With the cream, you will get a thick and creamy curd.
Health Benefits of Yogurt / Curd :
1. Yogurt comes from milk. So yogurt eaters will also get a dose of animal protein (about 9 grams per 6-ounce serving), plus several other nutrients found in dairy foods, like calcium, vitamin B-2, B-12, potassium, and magnesium.
2. Yogurt May Reduce the Risk of High Blood Pressure
3. Yogurt With Active Cultures May Discourage Vaginal Infections
4. Yogurt May Help You Feel Fuller
So try this recipe and write back to us…We love to hear from you.

Get this Related Posts Widget


Wednesday, 10 September 2014
Curry Leaves Chutney
Kadi patta or curry leaves commonly used as seasoning, this leaf adds a special flavor to every dish it is added to. Curry leaves are Packed with carbohydrates, fiber, calcium, phosphorous, iron, magnesium, copper, minerals and vitamins like nicotinic acid and vitamin C, vitamin A, vitamin B, vitamin E, antioxidants, plant sterols, amino acids, glycosides and flavonoids, curry leaves help your heart function better, fights infections and can enliven your hair and skin with vitality.
So by using this curry leaf we can prepare chutney to serve with breakfast dishes like Idli, Dosa, Pesarattu, Upma, Vada and Pongal. Apart from curry leaves which is the main ingredient, fresh coconut is also added and this is also a no onion and no garlic recipe.

Ingredients for Curry leaves chutney :
2tsp oil
1/2 tsp mustered seeds
3 to 4 stems Curry leaves
3 to 4 Green chillies
1/2cup grated fresh coconut
Small marble size Tamarind
Salt as per taste
1tsp gud or as per taste
1 pinch Hing
To prepare Curry leaves chutney :
1. Place a kadai on stove, put oil, mustered seeds. Once they start splutter add curry leaves, green chillies, and hing and fry for 2 to 3 min.
2. In a mixi jar add coconut, tamarind, salt, gud and the frayed curry leaves mixture and grind them to make chutney.
3. Temper it with mustered seeds and hing. Curry leaves Chutney is ready to serve with breakfat dishes like Idli, Dosa, Pesarattu, Upma, Vada and Pongal.
Tips / Notes :
- If u want u can add Rosted channa dal or fried Penuts to this chutney.
- I dont prefer to put tadka for any chutneyso that i can use it for more than a day by keeping it in refrigerator.
- This is also a no onion and no garlic recipe. So u can prepare this chutney during fasting.
Health Benefits of curry leaves :
1. Helps keep anaemia at bay
Tip: If you suffer from anaemia eat one date (khajoor) with two kadi patta leaves on and empty stomach every morning. This will not only help keep your iron levels up it will also help make you stronger and beat the symptoms of anaemia.
2. Protects your liver from damage
Tip: This remedy is very effective to strengthen the liver. Heat one spoon of homemade ghee, add the juice of a cup of kadi patta, some sugar and freshly powdered pepper. Remember to only heat this mixture a little as Kaempferol boils at very low temperatures and will evaporate if overheated.
3. Keeps your blood sugar levels under check – fights diabetes
Tip: To help keep your blood sugars under check you should ideally add kadi patta to all your meals. Alternatively having fresh leaves on an empty stomach everyday can also help.
4. Can help relieve the symptoms of diarrhoea
Tip: If you suffer from diarrhoea gently crush some kaddi patta into a ball (the size of a berry), and drink it with some butter milk. Do this twice to thrice a day for relief.
5. Reduces congestion in the chest and nose
Tip: To relieve congestion take a spoon of powdered curry leaves and add a spoon of honey to it. Make it a paste and eat this solution twice a day.
6. Is great to stop hair fall, premature greying of the hair and accelerate hair growth
Tip: To help strengthen your hair and fight dandruff, add the juice of kadi patta, to 100ml of coconut oil. Heat this oil till it turns blackish and apply it to your scalp regularly.
So try this recipe and write back to us…We love to hear from you.
Get this Related Posts Widget
Saturday, 6 September 2014
SIMPLE VEGETABLE SAAGU
Vegetable Saagu is a classic Kannadiga dish. Visit any of the Darshini hotels or Dosa corners and you are sure to see Vegetable Saagu as their signature dish. I prepare this dish with leftover vegetables at the weekend or month end dazzle with flavour and aroma and are not less worthy than any other exotic dish. Traditionally we prepare saagu using grinded masala. But in this recipe I am not using any grinded masala to fasten its cooking process. This saagu an be served with Avalakki set Dosa, Set Dosa, Rava Idly, Rava Dosa, Chapathi, Poori, Any type of Dosa, or even with rice.


3 tsp Olive oil
1 tsp cumin seeds
3 small piese cinomon sticks
4 cloves
2 green cardamoms
1 star anise
2 med size chopped onions
1 tsp ginger garlic paste
1 stem curry leaves
1 cup green beans
1 med size chopped Capcicum
2 med size chopped tomatoes
2 boiled potatoes chopped in cubes
1 tsp Red chilli powder
1&1/2tsp coriander powder
1 tsp garam masala powder
Salt as per taste
To prepare Vegetable Saagu :
1. Heat oil in a kadai or pan. Whole garam masala (cinomon sticks, cloves, green cardamoms and star anise) and saute till aroma comes from garam masala.
3. Add cumin seeds, chopped onions, ginger garlic paste, curry leaves and salt. Cook till onions are slightly golden brown, at this point add green beans and capsicum and saute for 2 min.
4. Now add required amount of water, tomatoes, cooked potato cubes, chilli powder, coriander powder and cook for 10 more min.
5. Add garam masala powder. At this stage taste the curry and adjust the salt and spice level.
5. Vegetable Saagu is ready to serve. Serve hot with Avalakki set Dosa, Set Dosa, Rava Idly, Rava Dosa, Chapathi, Poori, Any type of Dosa, or even with rice.
Tips / Notes :
- For this recipe u can add Curd to get mild flavour.
- Adjust the whole garam masal, spice and salt level as per your taste.
- U can prepare this recipe by just adding garlic paste instead of Ginger garlic paste.
- U can omitt Ginger garlic paste to prepare it as fasting recipe.
- U can add vegetables of your choice.
Health benefits
1. Most vegetables are naturally low in fat and calories. None have cholesterol.
2. Vegetables are important sources of many nutrients, including potassium, dietary fiber, folate (folic acid), vitamin A, and vitamin C.
So try this recipe and write back to us…We love to hear from you.
Get this Related Posts Widget
Authentic Andhra Tasty Tomato DAL
Tomato Dal or Tomato Pappu or Tomato Bele is a tasty and simple delicious Dal prepared in mostly each and every south Indian homes every day. Boiled and mashed dals cooked with some tangy tomatoes. This recipe is very simple to prepare and it tastes wonderful.


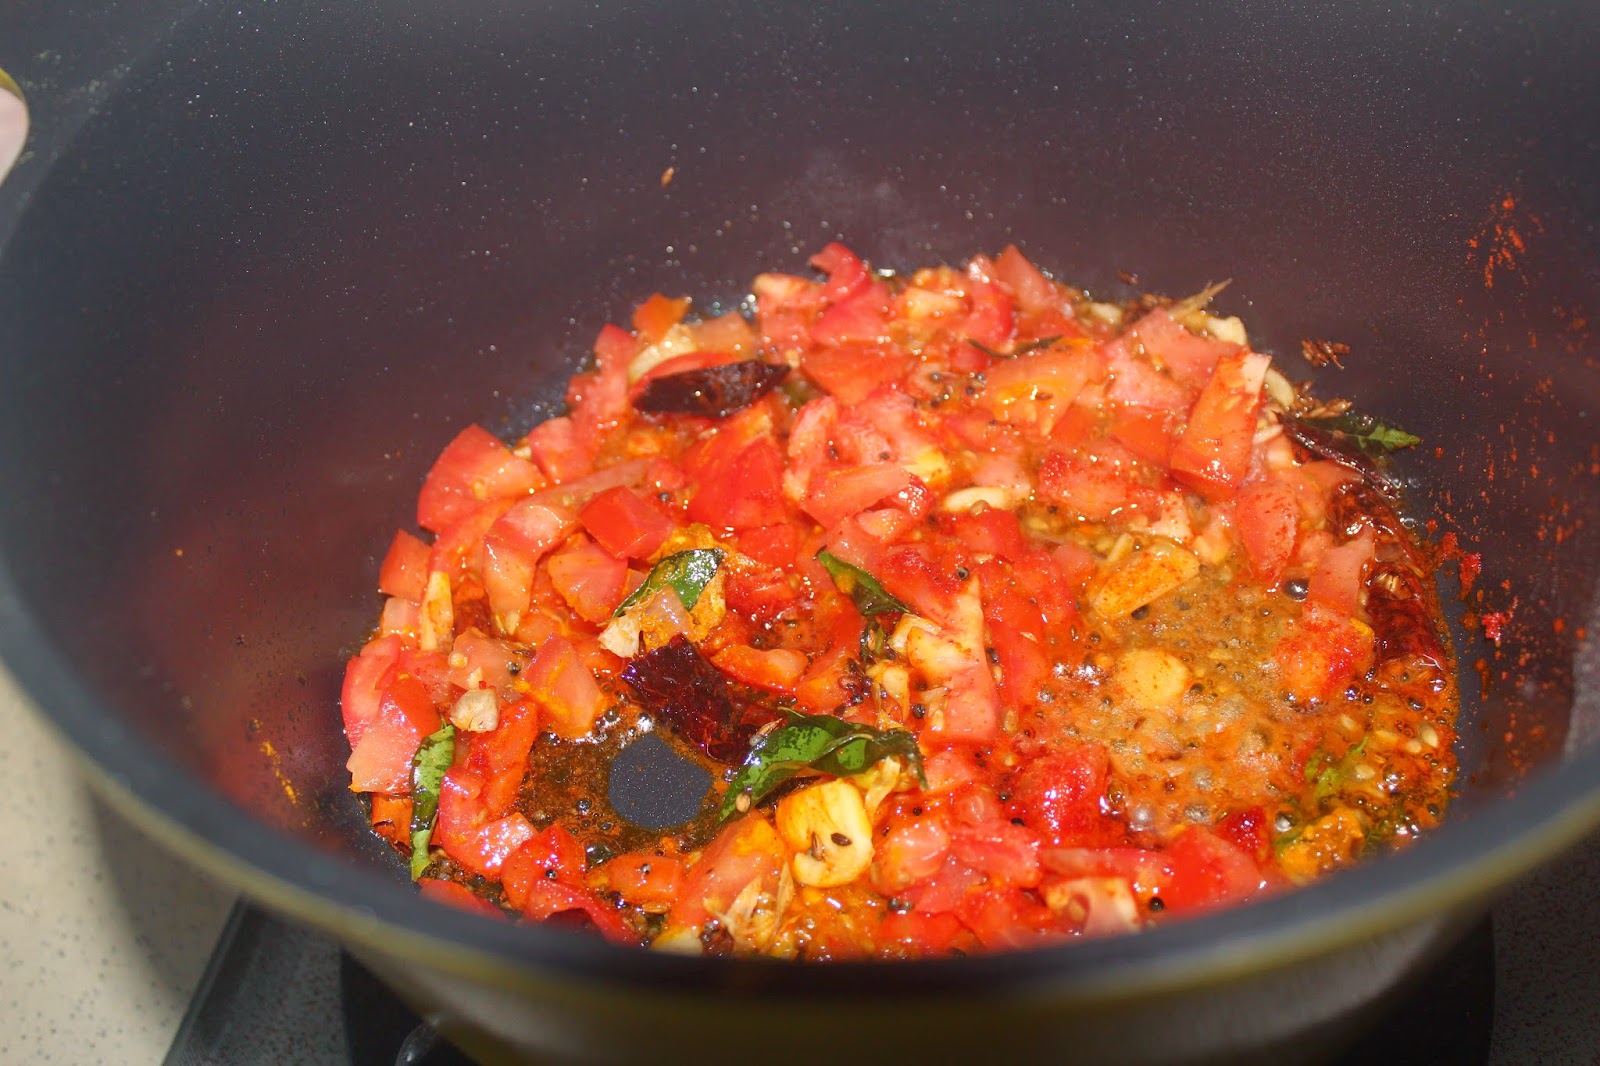

Ingredients for Tasty Tomato DAL:
Toor Dal: 1/2 cup
Toor Dal: 1/2 cup
Moong Dal : 1/2 cup
Tomatoes : 1 cup chopped
Ghee : 2 tbsp
Tomatoes : 1 cup chopped
Ghee : 2 tbsp
Mustard Seeds : 1/2 tsp
Cumin seeds : 1/2 tsp
Dried Red Chillies : 4
Garlic cloves : 3 to 4 sliced thinly
Dried Red Chillies : 4
Garlic cloves : 3 to 4 sliced thinly
Hing : 1 pinch
Curry Leaves : 1 string
Red Chilli Powder: 1 tsp or as per taste
Turmeric Powder : 1/4 tsp
Salt to taste
To prepare Tasty Tomato DAL:
1. Pressure cook the rinsed toor dal and moong dal till they become mashy. approximately 4 to 5 vishal.
2. Heat ghee in a pan add red chillys, mustered seeds, cumin seeds, sliced garlic cloves, curry leaves add tomatoes saute for a while then add chilly powder, turmeric powder, hing, salt and cook for 3 min, pour the cooked dales and cook for some time.
3. Switch off the flame and serve hot with steamed rice / Idli / chapati / roti.
Tips / Notes:
- U can add fennel seeds instead of garlic cloves for to get fennel flavored dal.
- U can add Channa dal and Toor Dal 1/4 cup each instead of adding Toor Dal 1/2 cup
Health Benifits :
Lentils are Low in calories and high in nutrition - that anyone can benefit from by incorporating this healthy legume into their diet.
For Detailed information about lentils refer www.mindbodygreen.com .
Get this Related Posts Widget
Mixed Vegetable Saagu Karnataka Style
Mixed Vegetable Saagu is basically a coconut based vegetables curry with a beautiful blend of flavors and spices. Mixed Vegetable Saagu is one of the most popular side dishes in almost all kannadigas house. Restaurants in Karnataka that is usually served it with Avalakki set Dosa, Set Dosa, Rava Idly, Rava Dosa, Any type of Dosa, Chapathi, Poori, the list is endless. You will surely see a little cup of this along with some chutney. And this is one of my family favorite side dish too.


Ingredients for Mixed Vegetable Saagu :
Finely chopped mixed vegetables (ex : Beans, Carrot, Potato, Peas, cauliflower, chayote squash etc- Quantity of veggies are your choice. I normally add more vegetables)
Salt
Lemon -1
Coriander leaves - to garnish ; chopped
Salt
Lemon -1
Coriander leaves - to garnish ; chopped
For Masala To grind :
Grated Coconut - 1/2 cup
Roasted chana dal / Putani- 2 tbsp
Soaked Poppy seeds / Khus khus- 2 tsp
Coriander seeds / Dhania - 1 tsp
Cumin seeds / Jeera - 1/2 tsp
Cinnamon sticks - 1" stick 3 pieces
Cloves - 3 -4 nos
Star anise /Chakri phool- 1 no
Cardamom / Elaichi -2 no
Mace / Javitre / Japtre - little
Dried kapok buds / Shalmali / marathi moggu-2 -3
Ginger - a small piece
Garlic - 3-4 pods
Onion - 2 -3 slice
Green Chillies - 4-6
Pudina / Coriander leaves or both - a handful
For Tempering :
Oil - 2-4 tsp
Mustard Seeds - 1tsp
Split black gram / urad dal - 1 tsp
Curry leaves - few
Turmeric / Haldi -1/4 tsp
2 Red chillies cut into half
2 med Onions finely chopped
1 med Tomato finely chopped
To prepare Mixed Vegetable Saagu :
1. Cook the veggies with some salt and water till done. Ensure that they are cooked just right.
2. For the masala, grind all the ingredients mentioned under masala to grind to a smooth paste adding some water.
3. Heat oil in a kadai or pan. Add mustard seeds and urad dal. When they start splutter add broken red chillies, curry leaves and haldi. Add chopped onion fry till translucent. Add chopped tomatoes. Fry for some more mins.
4. Add cooked veggies and masala paste. Add salt and water. Mix well and allow it to boil well. When it boils, saagu gets thickens a bit. If requied add some more water to get the desired consistency.
5. Switch off the flame and add chopped coriander leaves and squeeze lemon juice. Serve hot Vegetable saagu with Avalakki set Dosa, Set Dosa, Rava Idly, Rava Dosa, Chapathi, Poori, Any type of Dosa, or even with rice.
Tips / Notes:
- If u don't have all the garam masala ingredients mentioned under Masala To grind, you can manage with cinnamon, cloves and elaichi. Later add some Garam masala powder.
- U can add vegetables of your choice.
- Adjust the whole garam masal, spice and salt level as per your taste.
Health Benefits :
1. Most vegetables are naturally low in fat and calories. None have cholesterol. (Coconut may add fat, calories, or cholesterol.)
2. Vegetables are important sources of many nutrients, including potassium, dietary fiber, folate (folic acid), vitamin A, and vitamin C.
Get this Related Posts Widget
Thursday, 4 September 2014
Tomato Onion Pachadi or Tomato Onion Chutney
Tomato Onion Pachadi or Tomato Onion Chutney is one of the easiest chutney recipes and can be prepared very quickly. It goes well with dosas, idlis, chappatis and even plain rice. Sometimes this chutney is also used to mix with left over white rice and eaten as a spiced rice. This is a good spread for sandwiches too.


Ingredients for Tomato Onion Pachadi or Tomato Onion Chutney:
3 Tomatoes fully riped chopped
2 Oninos chopped length wise
6 green Chillies
½ lemon sizeTamarind
2 tsp Oil
½ tsp Mustard Seeds
1 tsp Coriander Seeds
¼ tsp Fenugreek Seeds
Salt to taste
To prepare Tomato Onion Pachadi or Tomato Onion Chutney :
1.Chop the onions and tomatoes.
2. In a pan heat oil. Add the mustard seeds, coriander seeds, fenugreek seeds. Once mustard start splutter, add onions, green chillies, tomatoes and tamarind and fry them till onion become translucent.
3. Switch off the stove and bring this to room temperature.
4. Grind them by adding salt and required amount of water.
5. After grinding them in smooth paste, add tadka with mustard seeds, dry red chillies and curry leaves if required. Tomato Onion Pachadi or Tomato Chutney is ready to serve with breakfast dishes like upma, pongal, pesarattu, dosa, idli and vada. U can even use this to spred on the dosa while preparing masala Dosa or spicy Dosa.
Tips / Notes :
- I don't prefer to put tadka for any chutneys so that I can use for more than one day by keeping it in refrigerator.
- U can adjust the spice, salt and sour level as per your requirement.
So try this recipe and write back to us…We love to hear from you.
Get this Related Posts Widget
Sunday, 31 August 2014
Bottle gourd stir fry
Bottle gourd stir fry is quick and easy side dish and goes well with rice and rasam or sambhar. This stir fries do not need too many ingredients to cook either and Bottle gourd is very healthy food for everyone.


Ingredients for Bottle gourd stir fry:
2 cups Bottle gourd chopped
3 tbsp olive oil
1/2 tsp mustard seeds
1/2 tsp cumin seeds
2 green chillis
1 stem curry leaves
2 med Tomatoes chopped
1/2 tsp Red chilly powder
A pinch turmeric powder
Salt to taste
To prepare Bottle gourd stir fry:
1. Wash and peel the skin of the bottle gourd and chop to bite sized pieces
2.Heat oil in a wide heavy bottomed pan, add mustard seeds, cumin seeds, when they begin to crackle add curry leaves and green chilis and fry for a while.
3. Add the bottle guard, sprinkle salt and turmeric.
4. Fry on a medium to high flame for 3 to 5 mins, keep stirring to prevent burning till bottle guard cooked 80%. Add tomatoes, red chilli powder, coriander powder mix well and cook till it is fully cooked.
5. Serve hot with rice and rasam or sambhar. Even u can serve this with white rice and Ghee.
Tips / Notes:
- U can add ginger garlic paste for this stir fry it taste yummy.
- U can add Onion before adding the Bottle gourd this will give light different taste and flavor.
- Adjust spice and salt level as per your requirement.
- I make my stir fries always on the high flame so that I can cook faster. To prevent burning I always use heavy bottomed pan. If you are not using a heavy bottomed pan, cook on a medium flame else your veggie can be burnt.
Health Benefits of Bottle Guard:
- Aids digestion
- Great for weight loss
- Helps treat urinary disorders
- Refreshes you during summers
- Prevents heart disease
- Reduces stress
So try this recipe and write back to us…We love to hear from you.
Get this Related Posts Widget
Friday, 22 August 2014
Home made Lemon Pickle (Nimbu ka Achar) .... Kitchen Basics
I have started making pickles after watching Maaoori vanta program in maa TV few years back. Because most of the time MIL and mom’s pickle get finish off soon and also really hated the store bought one. Before that, I thought it is difficult for me to proceed because of its lengthy process. Thanks to maa TV for telecasting such a wonderful recipes with easy steps. I noted down the recipe when the program telecast-ed and start to do by my own by adjusting the spice and salt level. When I distributed these pickles to my friends they admire the taste and started to ask recipes. For all my pickle lovers, here comes the recipe.


15 to 20 no’s Lemons (medium size)
½ cup Salt (approx. 5 to 6 table spoons)
½ cup Red chilli powder
½ cup Oil (til or ground nut oil would be good)
½ tbsp. Turmeric Powder
1 tbsp. Methi powder(fenugreek)
½ tsp Hing (asafoetida)
4 to 5 no’s Red
1 tbsp. Mustard seeds
To prepare Lemon Pickle (Nimbu ka Achar):
1. Wash the lemon, pat and dry them nicely using a kitchen towel. Cut lemons into medium size pieces.
2. Remove the seeds using the knife edge otherwise the pickle tastes bitter.
3. In a mixing bowl add Lemon pieces, ½ cup salt and ½ tsp Turmeric Powder mix well so that each lemon slice gets coated with salt and turmeric. Keep it in a dry bottle or any dry glass Jar for 3 days. (shake the jar well every day)
2. Take a frying pan. Heat 1\2 cup of oil. Add Mustard seeds, Red chillies and Hing (asafoetida) to it. Let the Mustard seeds splutter. Remove it from the flame and let it cool completely.
3. Take large bowl, put the marinated lemon pieces into it. Add ½ cup red chilli powder, 1 table spoon Methi powder (fenugreek) to it and Mix well.
4. Add the cooled thadka to the Lemon Pickle (Nimbu ka Achar) and mix well. Store it in air tight jar. Lemon Pickle (Nimbu ka Achar) in Andhra style is ready. Serve it with Curd rice.
5. This can stay more than 4 months if u keep it outside. You can store this in refrigerator too for longer life (more than 6 months).
Tips / Notes :
- U can adjust the Salt and chilli powder levels as per your requirement.
- U can add Green chillies instead of red chilli powder.
- Make sure that the Mixing bowl and spoon you are using should be dry.
- Always use dry Bottle to store the pickle.
- Whenever you are taking the pickle for serving just mix it from top to bottom and then take the required quantity of pickle by doing this more oil will not come to the spoon.
Health Benefits of Lemon:
The health benefits of lemon include its use as a treatment of throat infections, indigestion, constipation, dental problems, and fever, internal bleeding, rheumatism, burns, obesity, respiratory disorders, cholera and high blood pressure, while it also benefits hair and skin care,. Known for its therapeutic property since generations, lemon helps to strengthen your immune system, cleanse your stomach, and it is considered a blood purifier.
Lemon juice, especially, has several health benefits associated with it. It is well known as a useful treatment for kidney stones, reducing strokes and lowering body temperature. As a refreshing drink, lemonade helps you to stay calm and cool.
So try this recipe and write back to us…We love to hear from you.
Get this Related Posts Widget
Subscribe to:
Posts (Atom)