Monday, 23 June 2014
Pan Fried Fish
Last Sunday, I wanted to buy some fish, so I went to Fair price supermarket to hunt for the fillet. I went to the frozen food section, saw this Fish & Co. frozen Sutchi fillet. Immediately I took a packet. This fillet is skin less, bone less. Now, lets look at my pan fried Sutchi fillet recipe.


Ingredients for Pan Fried Fish :
Sutchi Fillets : 2 no's
2 tsp Olive oil
1/2 tsp Red Chilli Powder
1/4 tsp Coriander Powder
1 pinch Turmeric Powder
Salt: as per taste
Side dishes :
Lettuce 6 leaves
2 no's Mashed potato combined with salt and ghee
1 no grated Carrot
To prepare Pan Fried Fish :
1. After defroze the fillet, wash and dry with kitchen towel.
2. Mix Red Chilli Powder, Coriander Powder, Turmeric Powder and salt and sprinkle it on both sides of the fillet.
3. Heat non stick pan with oil and place the fillets and shallow fry until golden brown on both sides.
4. Pan fried sutchi fillet is ready to serve. Serve it as side dish with rice or serve it with mashed potato, chopped lettuce and grated Carrot as shown in the picture.
Tips / Notes:
- U can use Fish Fillet instead of Sutchi fillet.
- U can Immerge the fish in the egg, then cover both sides with the bread crumb before pan frying. This will give more crunchiness outer layer.
- U can sprinkle salt and Pepper powder Instead of Chilli Powder, Coriander Powder.
So try this recipe and write back to us…We love to hear from you.
Get this Related Posts Widget
Saturday, 21 June 2014
Fried Puffed Rice mixture with Garlic flavour
Searching for a quick, easy and oil-less snacks, here comes Fried Puffed Rice mixture with Garlic flavor - u have to give a trial to this. If you want to eat something with a feeling of fullness, yet no fat, very light and quick-made, this bowl of Fried Puffed Rice mixture with Garlic flavor is best. We used to have this often in the evening with tea. First my MIL used to make it and I don’t remember when I started preparing it myself. In my family it is top one team outing snack too.


Ingredients for Fried Puffed Rice mixture :
500 gm Puffed rice
3 tbsp Oil
1 tsp mustered seeds
1 tsp mustered seeds
10 nos Garlic cloves (crushed)
7 Green chillies (cut in lengthwise)
Few curry leaves
1/4 cup Roasted channa dal / pottukadalai / putani
1/2 cup Peanuts
1/2 tsp Turmeric powder
Salt to taste
To prepare Fried Puffed Rice mixture :
1. Heat oil in a wide pan add mustered seeds, Garlic, green chillies and Curry leaves. Fry them for minutes till garlic gets golden brown color.
2. After that add peanuts and fry for 3 min add turmeric powder and salt.
3. Then add the puffed rice, Roasted channa dal / pottukadalai / putani.
4. Mix it all together and let it sit in the heat for 5 minutes or till Puffed Rice becomes crispy. Store it in air tight container-it will stay for more than a month. Serve it with some hot Chai ( tea).
Tips / Notes:
· U can fry the peanuts separately before adding to this recipe.
· U can serve this by adding onions and tomatoes, but serve it immediately.
· U can add Casio nuts for this recipe too.
So try this recipe and write back to us…We love to hear from you.
Get this Related Posts Widget
Friday, 20 June 2014
Carrot Cup Cake with Wheat flour
If you are looking for a super yummy, low calorie version of a homemade carrot cup cake recipe, then you came to the right place! Healthy, moist, delicious Carrot cup Cake with Wheat flour. The fact that it’s packed full of really good nutrients for you. If you've never eaten a carrot cup cake with wheat flour before or you’re worried about adding wheat flour to a cake recipe, fear not. The cup cake comes out so well plus carrot increase the moistness of the cup cake.


Ingredients for Carrot Cup Cake with Wheat flour :
2 cup grated Carrot
1/4 cup sliced Almonds
1 & 1/2 cup Wheat flour
1 cup sugar
3 Eggs
80 ml Refined Oil
1 tsp Baking soda
To prepare Carrot Cup Cake with Wheat flour :
1. Preheat the oven for 220'c for 10 min.
2. Mean wile add all dry ingredients - Wheat flour, Baking soda and sieve them 2 times.
3. In a bowl add Eggs and Sugar and beat with hand beater for 5 min. Then add oil to it and beat for 2 more min.
4. Put dry ingredients mix, grated Carrot, sliced Almonds to wet ingredients and mix well with cut and fold method.
5. Distribute the batter evenly among the prepared cupcake liners. Bake at 220'c for 10 to 12 minutes, or until a tester inserted into the center of the cupcakes comes out clean. Cool the cupcakes for five minutes in the tin (taking them out too soon can distort the shape!) before removing them with a knife and setting them on a wire rack to cool completely.
6. Delicious Carrot cup cake is ready to serve.
Tips / Notes:
· U can prepare this cake using Mida/plain flour instead of wheat flour.
· Use the Preheat and baking instructions as per oven user guide.
· U can add walnut / pecan nut / chocolate chips for this recipe.
So try this recipe and write back to us…We love to hear from you.
Get this Related Posts Widget
Thursday, 19 June 2014
Anda Bhurji / Egg stir fry
Anda Bhurji / Egg stir fry- is popular dish in


Ingredients for Anda Bhurji / Egg stir fry :
Egg: 3 whole
3 tsp Olive oil
2 med Onions finely chopped
4 no's Green Chilli finely chopped (remove the seeds if you don't want it to be too spicy)
1 med Tomato finely chopped
1 tsp Red Chilli Powder
1/2 tsp Coriander Powder
1 pinch Turmeric Powder
Salt: as per taste
To prepare Anda Bhurji / Egg stir fry :
1. In a pan, heat oil, add the onions, curry leaves, green chillies and salt.
2. Sauté till onions become translucent. Then add the tomatoes and allow to cook in medium flame until the tomatoes are nicely cooked and mushy.
3. Add Red Chilli Powder, Coriander Powder, Turmeric Powder and mix well. Allow to cook for 3 min.
4. Then add eggs and wait till it starts cooking like an omelette. Now keep stirring vigorously, until u see the eggs crumbling and cook until all the moisture evaporates and u feel a nice aroma coming out.
4. Then add eggs and wait till it starts cooking like an omelette. Now keep stirring vigorously, until u see the eggs crumbling and cook until all the moisture evaporates and u feel a nice aroma coming out.
5. This just takes 5 to 10mins. Serve hot with Chapati, Roti , Plain rice or place it bitween two sandwich bred slices and have it as breakfast.
Tips / Notes:
· By adding Ginger garlic paste u can make it as masala Anda Bhurji / Egg stir fry
· For this recipe u can also add more optional vegetables like Peas / potaotes / mushrooms / capcicum.
· U can add some left over rice to this mix and make it into a instant egg fried rice.
Health Benifits :
Eating more eggs is a fantastic way to give yourself a health boost. Eating whole eggs is vital: the goodness of eggs is found in the yolk (containing over 90 percent of an egg’s calcium and iron) and the white (containing almost half the egg’s protein). If you’re not eating eggs regularly, here are five reasons why you should.
1. Get your vitamins
2. Boost your weight loss
3. Take in essential minerals
4. Indulge in low-calorie protein
5. Prevent breast cancer
So try this recipe and write back to us…We love to hear from you.
Get this Related Posts Widget
Wednesday, 18 June 2014
Event Announcement - Healthy breakfast Recipe!
The topic for this event is Simple and Healthy Breakfast recipe! I'm sure all of us are preparing healthy breakfast dishes that would help our family to be fit for the entire day. So do link all your breakfast recipes here! Looking forward to all the lovely entries from all my blogger and non-blogger friends.

To Participate :
You have to like SavisPassions Facebook page. This is mandatory.
Share about this event tagging 5 friends in your own timeline of FB page.
Get this Related Posts Widget
Monday, 16 June 2014
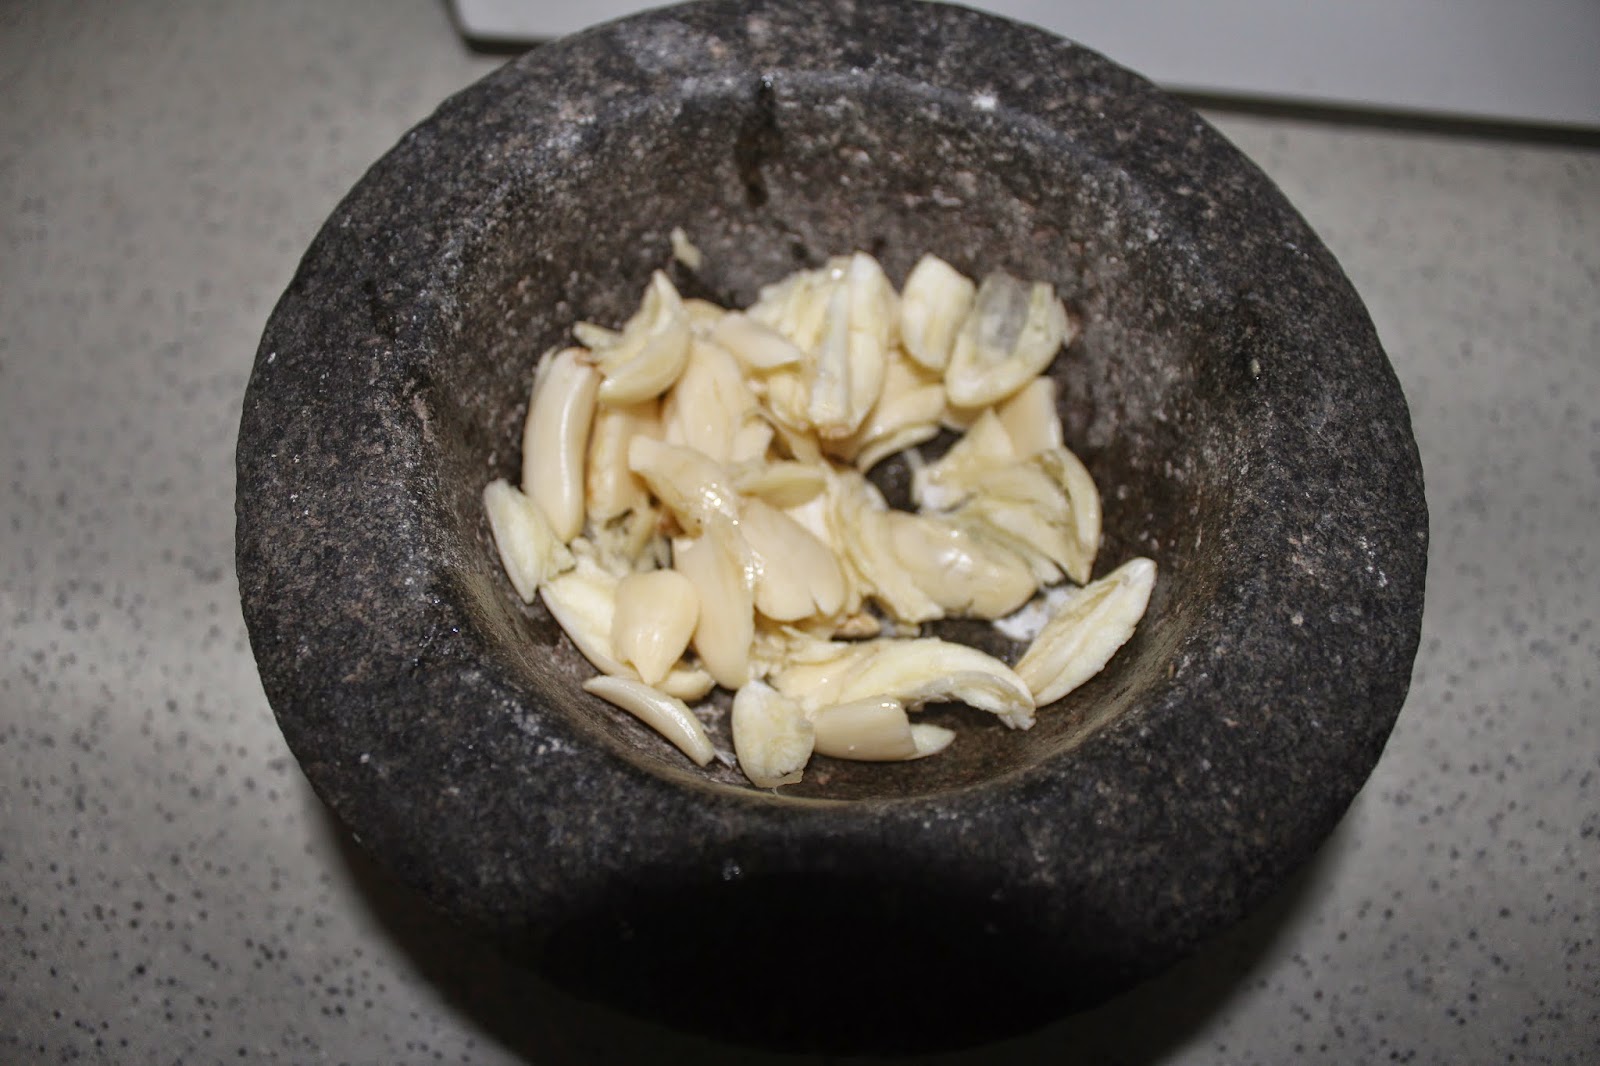
Coconut Garlic powder
Coconut Garlic powder, or Belluli chutney powder is made from fresh garlic, dry or fresh coconut and red chili powder. Coconut Garlic powder is one of the easiest recipe prepared with minimal ingredients and also one of the best confinement food for new mother.. This powder tastes good with Idli, Dosa, rice with clarified butter or rotis.

Ingredients for Coconut Garlic powder :
Dry coconut 1/2
Dry coconut 1/2
Garlic cloves 8 to 10
Red chillies 8 to 10 no's
Salt to taste
To prepare Coconut Garlic powder :
1. Dry roast the grated dry coconut till golden brown.
1. Dry roast the grated dry coconut till golden brown.
2. Grind it with garlic, red chillies and salt. Store in an air tight container.
3. This is a very easy chutney powder and one of the best confinement food for new mother. Garlic is very good for heart. So try this recipe. This powder tastes good with idli, dosa, rice or rotis.
Tips / Notes:
· U can add raw coconut instead of dry coconut.
· U can add red chilli powder instead of whole red chllies.
· Adjust the garlic, spice and salt a per your requirement.
Health Benefits :
1. Garlic is known best for keeping cold at bay. It improves your immune system and strengthens up the natural defense system of the body.
2. Garlic has compounds that help prevent any kind heart disease.
3. Garlic also helps in the control of blood pressure or hypertension.
4. Garlic is effective against fighting off a host of infections. It is known for its anti-bacterial, anti-viral and anti-fungal properties
So try this recipe and write back to us…We love to hear from you.
Get this Related Posts Widget
Sunday, 15 June 2014
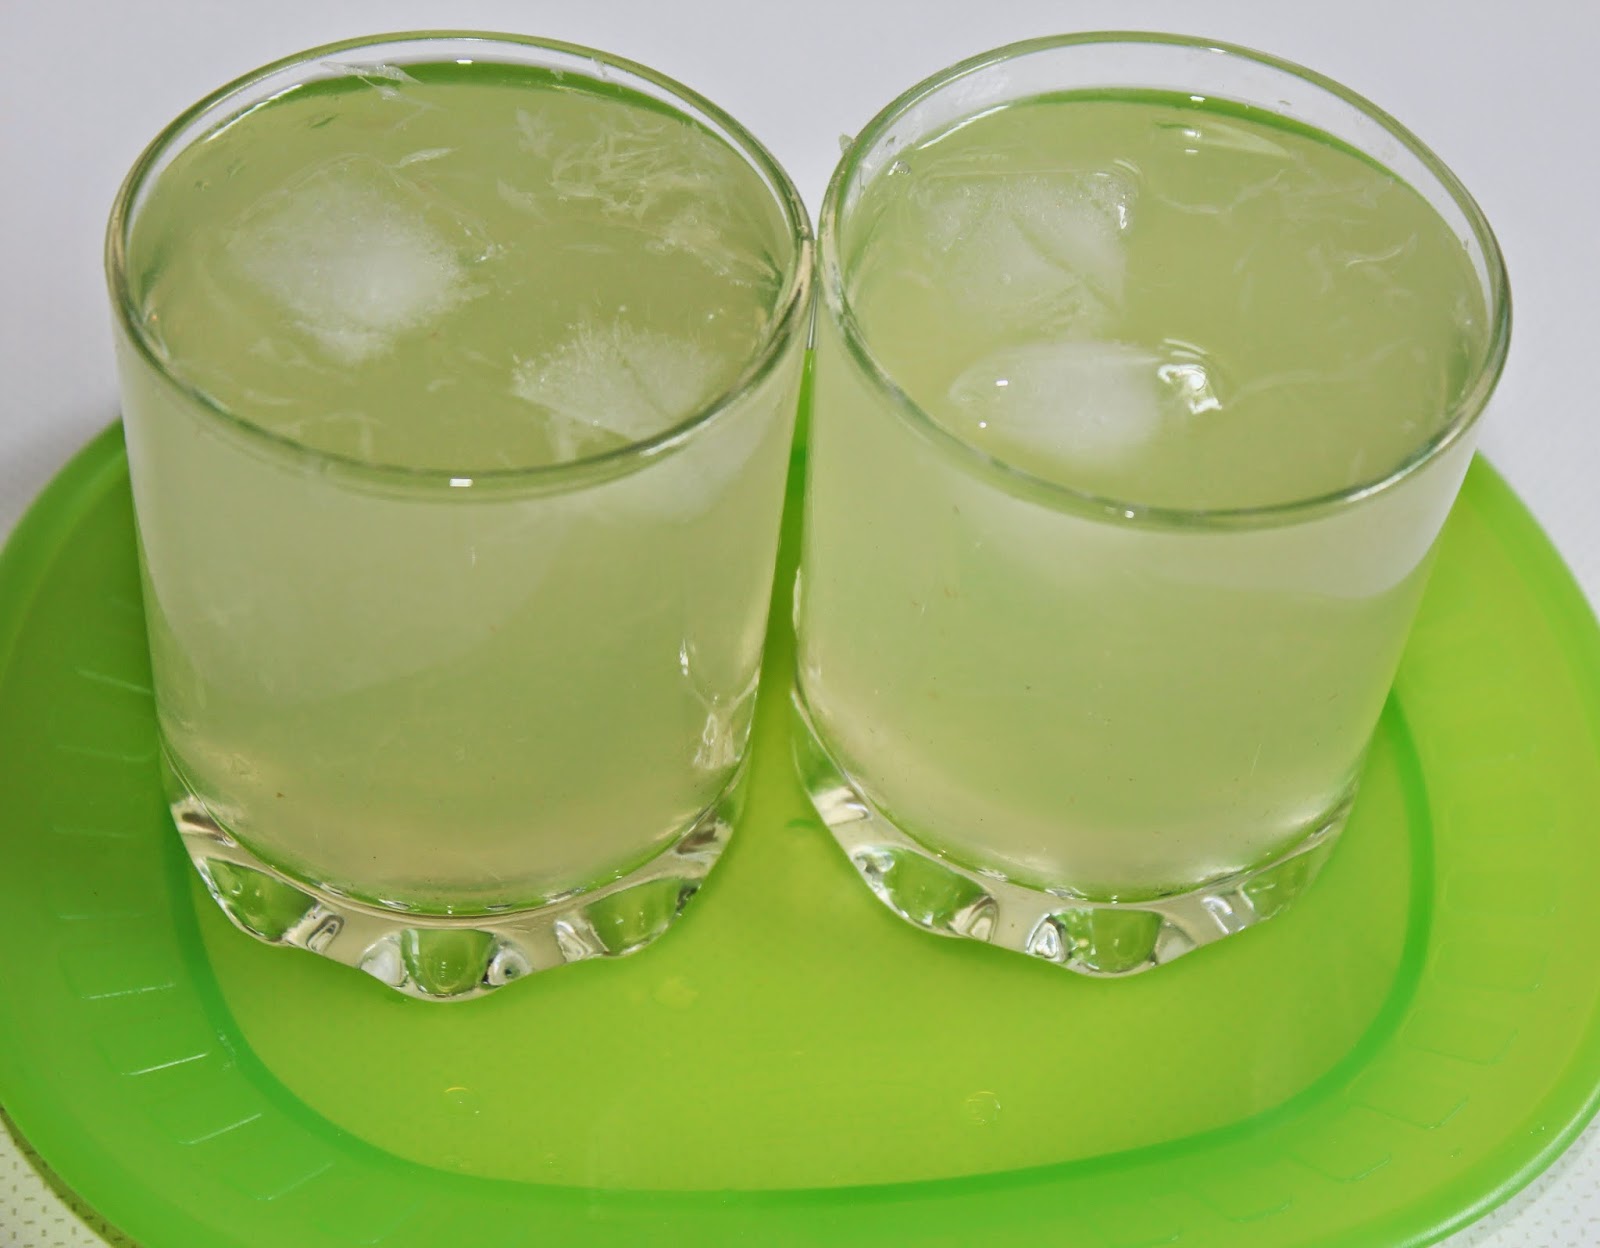
Instant Lemon juice or Nimbu Sherbet
A Summer drink Instant Lemon juice or Nimbu Sherbet is very easy to prepare with few ingredients. Instead of buying lemonade from the store to prepare this juice, we can prepare it using fresh Lemons or by using home made lemonade.

Ingredients for Instant Lemon juice or Nimbu Sherbet :
Lemon : 2 no's
Water : 4 glass
Sugar : 4tsp
Honey : 2 tsp
Cardamom : 2nos powdered
Ice cubes : 4 to 6
Salt a pinch
To prepare Instant Lemon juice or Nimbu Sherbet :
1. In a bowl take water, Squeeze out the lemon juice from lemons.
2. Add Sugar, Honey, Cardamom powder and salt and mix well till sugar dissolves in the water.
3. Instant Lemon juice or Nimbu Sherbet is ready to serve. Serve it with Ice cubes and for children serve it without Ice cubes.
Health Benefits :
Many of the benefits of lemons are lost or reduced if lemons are heated, so for maximum benefits eat or drink them fresh and raw!
Benefits of raw lemons includes:
1. Richest source of vitamin C of all the citrus fruits.
2. Naturally antiseptic and anti-bacterial.
3. Cleans the blood. Strengthens weak blood vessels.
4. Home remedy for colds and flu, sore throats, coughs, asthma, and bronchitis.
Lemon juice is an excellent anti-oxidant, and as part of a healthy diet will help protect against heart disease, cancer, viruses and allergies.
Caution: Which lemon juice is highly beneficial it is not advisable to take lemon juice if your stomach or intestines are inflamed.
So try this recipe and write back to us…We love to hear from you.
Get this Related Posts Widget
Karnataka style Vegetable Bath
This is how my mom makes the Authentic Karnataka style Vegetable Bath, which is cooked with spicy coconut paste and combined with mixed vegetables. The addition of vegetables to the bath makes it a complete nutritious meal which can be had as a filling breakfast, lunch or even dinner.. Basmati rice is not a good match for this spicy masala, which has it's own aroma so for this recipe I am using Sonamasuri Rice.


Ingredients for Authentic Karnataka style Vegetable Bath
3 cup Sonamasuri rice
6 cups water
3 tbsp olive oil
2 tbsp ghee
2 bay leaves
2 nos cinnamon stick
4 nos cloves
3 green Cardamoms
1/2 cup each Carrot, Capsicum, Potatoes
1/4 cup frozen piece
1 cup thick buttermilk / 1/2 cup curd
Salt as per taste
2 tbsp lemon juice
Masala to Grind
1/2 coconut chopped
1 no small Onion
1 no Tomato
5 to 6 Green chillies
2 inch Ginger
4 to 5 Garlic cloves
1 inch cinnamon stick
4 nos cloves
2 green Cardamoms
1/4 cup Coriander leaves
To prepare Authentic Karnataka style Vegetable Bath
1. Soak the rice for 30 min, drain the water and keep it aside.
2. Take a pan add a tbsp oil and roast the masala to grind items except Coriander leaves. Switch off the stove and bring it to room temperature. Make a coarse paste using mixi and keep it aside.
3. In a pressure cooker put 2 tbsp of oil and ghee, add bay leaves, cinnamon sticks, cloves, cardamoms then add onions and fry until onion turns dark golden brown colour. Add sliced veggies and Sambar powder and sauté for10 min then add ground masala, buttermilk/curd and sauté till raw smell leaves.
4. Add rice and fry for 5 min then add water, salt, lemon juice and mix well. Close the lid and pressure cook for 2 to 3 vishal.
5. Authentic Karnataka style Vegetable Bath is ready to serve. Decorate with Coriander leaves and serve it with Raita and Salan.
Tips / Notes:
- Coconut masala can be prepared early and keep in the fridge for at least 2 days to fasten the cooking process.
- U can add any vegetables as per your preferences.
- U can adjust the water quantity as per rice condition.
- U can use socked piece instead of frozen piece.
- U can add boiled Soya chunks to this recipe to enhance its mortician values.
Health Benefits :
1. Most vegetables are naturally low in fat and calories. None have cholesterol. (Sauces or seasonings may add fat, calories, or cholesterol.)
2. Vegetables are important sources of many nutrients, including potassium, dietary fiber, folate (folic acid), vitamin A, and vitamin C.
For more health Benefits and nutrition values information about veggies click choosemyplate
So try this recipe and write back to us…We love to hear from you.

Get this Related Posts Widget
Friday, 13 June 2014
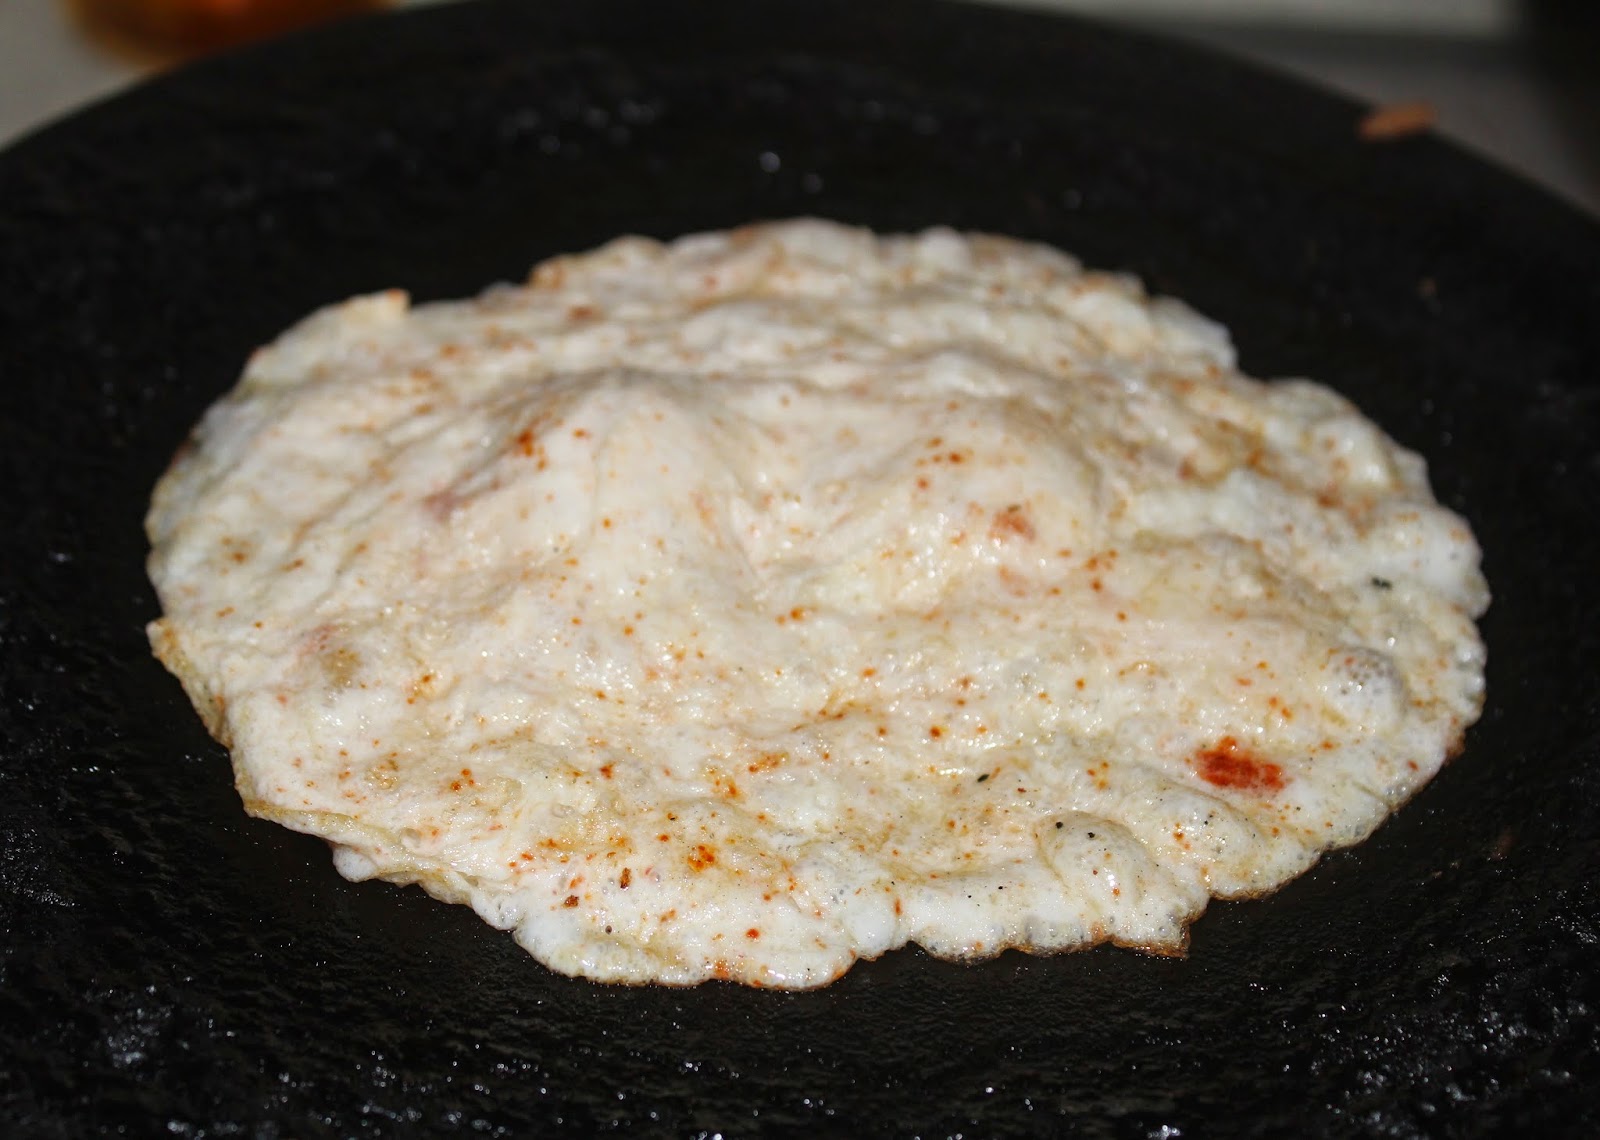
Cholesterol free Omelet
This Cholesterol free omelet made from egg whites and olive oil, this omlet could not be any healthier without sacrificing the look and the taste! This recipe is dedicated to my hubby who is having more health conscious now a days.
Ingredients for Cholesterol free Omelet :
To prepare 2 omelet
4 egg whites
2 tsp of water
2 tsp of olive oil
A small dash of turmeric (optional for color, great for health)
Salt and pepper to taste
Optional: Filling of your choice for the omelet. But I am presenting simple omelet without any filling recipe.
2 tsp of water
2 tsp of olive oil
A small dash of turmeric (optional for color, great for health)
Salt and pepper to taste
Optional: Filling of your choice for the omelet. But I am presenting simple omelet without any filling recipe.
To prepare Cholesterol free Omelet :
1. Mix all the ingredients lightly without making the egg whites frothy.
2. Heat a non-stick pan on medium heat. Add 1 tsp of olive oil. Pour the 1/2 mixture in the pan.
3. As the eggs sets, lift the outside edges with a spatula to let the runny eggs slip under. Continue to cook till the eggs are set. Fold in half and serve.
4. Repeat the same steps for second omelet too.
Health Benefits :
One of the biggest differences between egg yolk omelets and egg white omelets is a high amount of fat in the egg yolk version. Almost all of the fat found in an egg is located in the yolk. Egg yolks have also be found to contain high amounts of dietary cholesterol, which can lead to the development of a number of serious health conditions that can be life threatening. While there are certain medications that can be used to lower cholesterol, the best way to fight high cholesterol levels is to avoid their consumption altogether.
So try this recipe and write back to us…We love to hear from you.
Get this Related Posts Widget
Thursday, 12 June 2014
Tastey and Healthy Masala Kheer my 100th post!!
This Masala Kheer is filled with lots of nutritious values because of Nuts and Milk.
Its prepared with Indian vermicelli that is dry roasted / roasted in Ghee to a golden color, slowly simmered in milk and sugar, flavored with aromatic cardamom and garnished with toasted nuts. Simple to prepare, quick, comforting and delicious with a heavenly aroma! Its one of the South Indian Traditional sweets too.


Ingredients for Tasty Masala Kheer :
1/2 cup - Seviya (Vermicelli)
1/4 cup or less than that sugar
1 cup Full cream Milk
3 cup water
4 Green cardamom (powder)
2 tbsp Chiranji
2 tbsp Almonds
2 tbsp Cashios
2 tbsp Pistachios
2 tbsp Raisins
1 tbsp Desi Ghee/ Clarified butter
To prepare Tastey Masala Kheer :
1. Dry roast the Seviya (Vermicelli) and boil it in a pan by adding little olive oil, oil does not allow the Seviya (Vermicelli) to stick.
2. Add Desi Ghee/ Clarified butter in the hot pan, and add the nuts and sauté them till slightly colored.
3. In a bowl add Milk and Water then bring it to rolling boil then add boiled Seviya (Vermicelli), sugar and cook for 4 to 5 min.
4. When you see the milk is boiled and the vermicelli is soft. Add the fried nuts and cardamom powder and switch off the heat immediately.
5. Serve it hot or chill both taste great.
Tips / Notes :
- U can increase or decrease Seviya (Vermicelli), milk, water and sugar quantity as per u'r requirement. U can prepare this Masala Kheer by just adding milk.
- No need to rost if u use rosted Seviya (Vermicelli). This will fasten the cooking process.
- U can prepare simple Kheer by omitting Chiranji, Almonds and Pistachios.
- U can add any dry fruits of your choice including dates. But when u use dates add sugar by considering the sweetness of the dates.
- U can boil Seviya (Vermicelli) in milk directly to fasten the cooking process.
According to the National Dairy Council, Milk is filled with nine essential nutrients that benefit our health
Calcium: Builds healthy bones and teeth; maintains bone mass
Protein: Serves as a source of energy; builds/repairs muscle tissue
Potassium: Helps maintain a healthy blood pressure
Phosphorus: Helps strengthen bones and generate energy
Vitamin D: Helps maintain bones
Vitamin B12: Maintains healthy red blood cells and nerve tissue
Vitamin A: Maintains the immune system; helps maintain normal vision and skin
Riboflavin (B2): Converts food into energy
Niacin: Metabolizes sugars and fatty acid
Health benefits of Nuts :
Nuts are one of the best plant sources of protein. They are rich in fiber, phytonutrients and antioxidants such as Vitamin E and selenium. Nuts are also high in plant sterols and fat - but mostly mono unsaturated and polyunsaturated fats (omega 3 - the good fats) which have all been shown to lower LDL cholesterol.
Get this Related Posts Widget
Tuesday, 10 June 2014
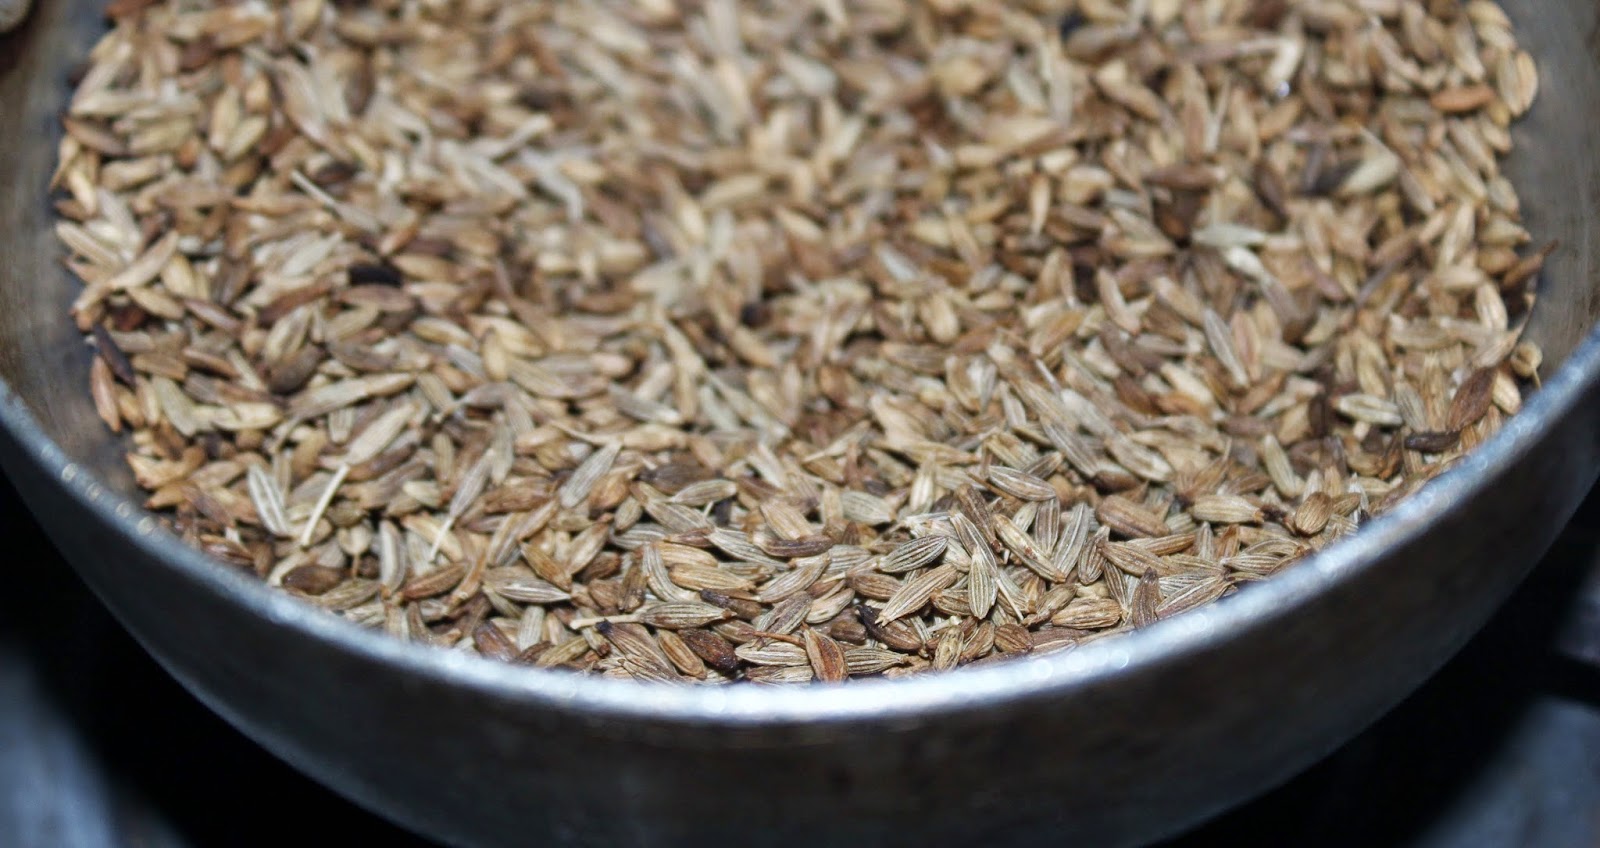
Homemade Cumin / Jeera / Jeerige Powder .... Kitchen Basics
Cumin powder, it's too simple and easy to make. You can do even 1 tbsp of cumin powder or any quantity of your choice, I normally do in small batch and store it in airtight container, so I can always have fresh cumin powder as nothing beats fresh roasted cumin powder it's just too fragrant. If u purchase cumin powder it's not always roasted that's why the color of powder is not dark brown. So don't wait go ahead and make your own batch of Cumin / Jeera / Jeerige powder and use in your recipes.


Ingredients for Homemade Cumin / Jeera / Jeerige Powder :
1/2 cup Cumin Seeds / Jeera / Jeerige
To prepare Homemade Cumin / Jeera / Jeerige Powder :
1. Heat a pan or wok and add cumin seeds, roast in medium flame until light dark brown and fragrant.
Tips / Notes:
· U can take the Cumin Seeds/Jeera/Jeerige as per your requirement.
· While roasting cumin seeds keep stirring otherwise cumin seeds will be burnt quickly. If you over roast them it will be very dark brown color and bitter in taste.
Get this Related Posts Widget
Subscribe to:
Posts (Atom)